

How to Set Up a Home Coffee Bar That Delivers
You could keep spending $6 a day on lattes and watch that add up to over $2,000 a year, or you could set up a home coffee bar that pays for itself within a month and makes every morning better. A dedicated home coffee station, as interior designers and baristas call it, gives you more than just cheaper coffee. It gives you a ritual, a space that belongs to you, and full control over what goes in your cup. This guide walks you through everything: location, gear, layout, and the small decisions that separate a frustrating counter setup from one you actually love using.
Table of Contents
- Key Takeaways
- How to set up a home coffee bar in the right spot
- Choosing your coffee bar essentials
- Setting up your coffee bar step by step
- Maintaining your coffee station over time
- My honest take on home coffee setups
- Stock your coffee bar with something worth brewing
- FAQ
Key Takeaways
| Point | Details |
|---|---|
| Location shapes everything | Pick a low-traffic spot near power outlets and water for the smoothest workflow. |
| Burr grinder before machine upgrades | Grind quality affects flavor more than any brewer you buy, even at the $30-$150 price range. |
| Workflow zones cut the chaos | Organize your station grinder-to-brewer-to-prep to reduce mess and save time every morning. |
| Start simple, then scale | A pour-over setup under $100 can rival expensive machines when paired with fresh, quality beans. |
| Freshness protection matters | Store beans away from sunlight and in airtight containers to preserve flavor between uses. |
How to set up a home coffee bar in the right spot
Before you buy a single piece of gear, you need to decide where your coffee station actually lives. This one decision shapes everything that follows, and most people get it wrong by defaulting to whatever counter space is available rather than what actually works.
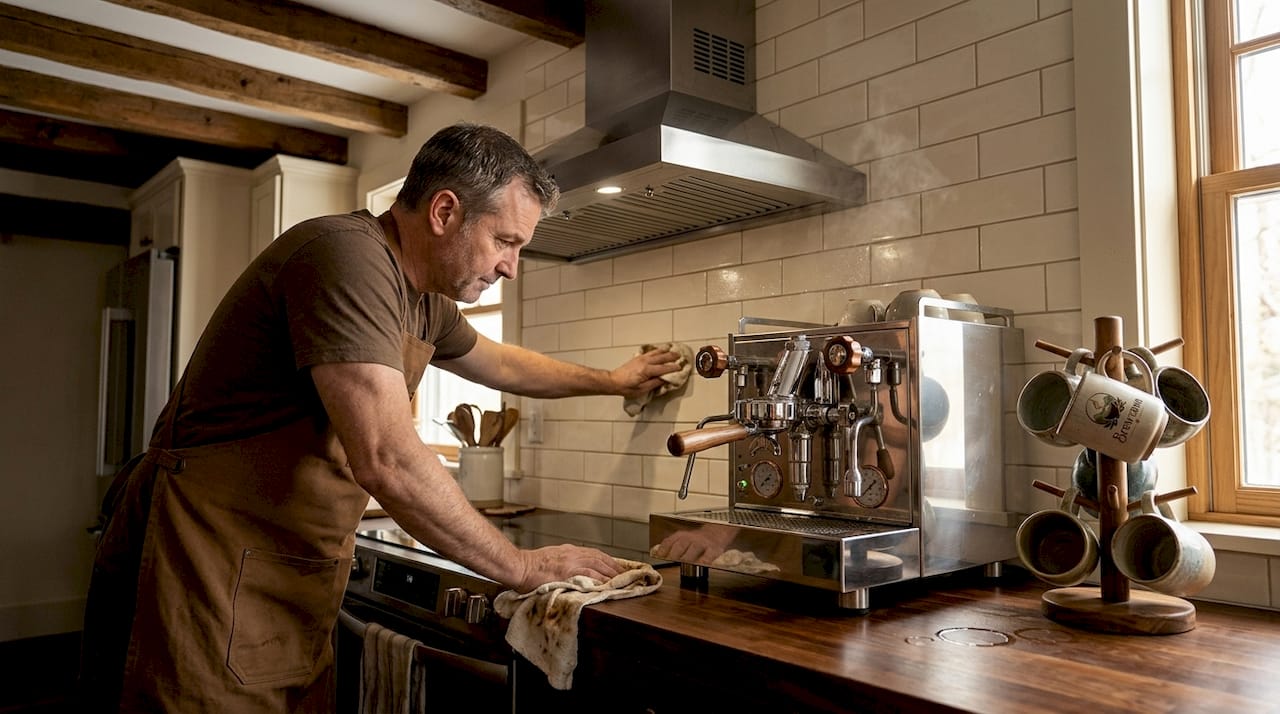
The two non-negotiables are power and water. Ideal placement near plug sockets and a sink makes your setup faster to use and easier to clean. Espresso machines, electric kettles, grinders, and milk frothers all need outlets, sometimes more than one. A power strip with surge protection mounted discreetly along the back of your station solves the multi-outlet problem without creating a cord mess.
The second rule is harder for most people to follow: avoid high-traffic kitchen zones near the stove or main sink. Cooking disrupts your brewing workflow, and the heat and steam from a stovetop can affect both your equipment and your beans. A dedicated corner of the kitchen counter, a section of a butler’s pantry, or even a dining room sideboard works far better than the busiest stretch of your kitchen.
Here are the most popular home coffee station ideas that actually work in real homes:
- Compact corner setup: A 24-inch stretch of counter with upper shelving. Works for pour-over or single-serve systems. Maximum efficiency in minimal space.
- Rolling cart: Perfect for renters or anyone without dedicated counter space. A sturdy bar cart holds a grinder, brewer, and supplies, then rolls out of the way when needed.
- Open shelving display: Visually striking, but requires consistent tidying. Great for showing off mugs, chemex brewers, and matching canisters.
- Closed cabinet station: Concealed storage protects beans from sunlight and hides clutter behind doors. The cleanest look with the least daily maintenance.
Pro Tip: Point your machine away from any window that gets direct morning sun. UV light degrades coffee beans quickly, and heat from sunlight can affect how your grinder performs over time.
Ventilation also matters more than people realize. Espresso machines generate significant heat and steam, so you need at least 6 to 8 inches of overhead clearance. Cramming a machine under a low cabinet shortens its lifespan and makes cleaning a frustrating ordeal.
Choosing your coffee bar essentials
Once you have a location, the equipment decisions start. The good news is that you do not need to spend a fortune to brew outstanding coffee at home. You need to spend it on the right things.
Machine types at a glance
| Brewer Type | Best For | Price Range | Skill Level |
|---|---|---|---|
| Pod/capsule machine | Speed and convenience | $50-$300 | Beginner |
| Pour-over (e.g., Hario V60) | Clarity and control | $20-$80 | Intermediate |
| French press | Bold, full-body cups | $25-$60 | Beginner |
| Semi-auto espresso | Cafe-quality shots | $300-$800+ | Intermediate/Advanced |
| Bean-to-cup machine | Automation with fresh grind | $400-$1,500 | Beginner |
If you are drawn to convenience, gourmet coffee pods have improved dramatically in quality and are a legitimate choice for a busy household. But if flavor is your priority, manual methods like pour-over or French press outperform many machines for home enthusiasts when used with precision.
The single most impactful upgrade you can make, regardless of what brewer you choose, is a burr grinder. Burr grinders in the $30 to $150 range affect your cup quality more than any machine upgrade. Blade grinders chop unevenly, which creates inconsistent extraction and bitter or sour notes. A burr grinder produces uniform grounds every time. Grind fresh right before brewing, every single time.
Beyond the brewer and grinder, these are the tools that genuinely earn their counter space:
- Digital scale: Coffee is a ratio game. A 1:16 coffee-to-water ratio (by weight) is the standard starting point for most pour-over methods, and a scale makes it repeatable.
- Variable-temperature kettle: Water temperature matters. Most light roasts extract best at 200°F, while darker roasts prefer 195°F. A gooseneck kettle also gives you pour control for manual methods.
- Milk frother: A handheld frother ($10) does a respectable job for lattes and cappuccinos. A steam wand adds complexity but comes with a learning curve.
- Airtight storage canister: Beans go stale faster than most people think. Keep them in a stale-preventing airtight container, away from light, heat, and moisture.
Pro Tip: Buy whole beans and grind on demand. Pre-ground coffee loses peak flavor within 15 to 30 minutes of grinding. That single habit upgrades your cup more than most gadgets will.
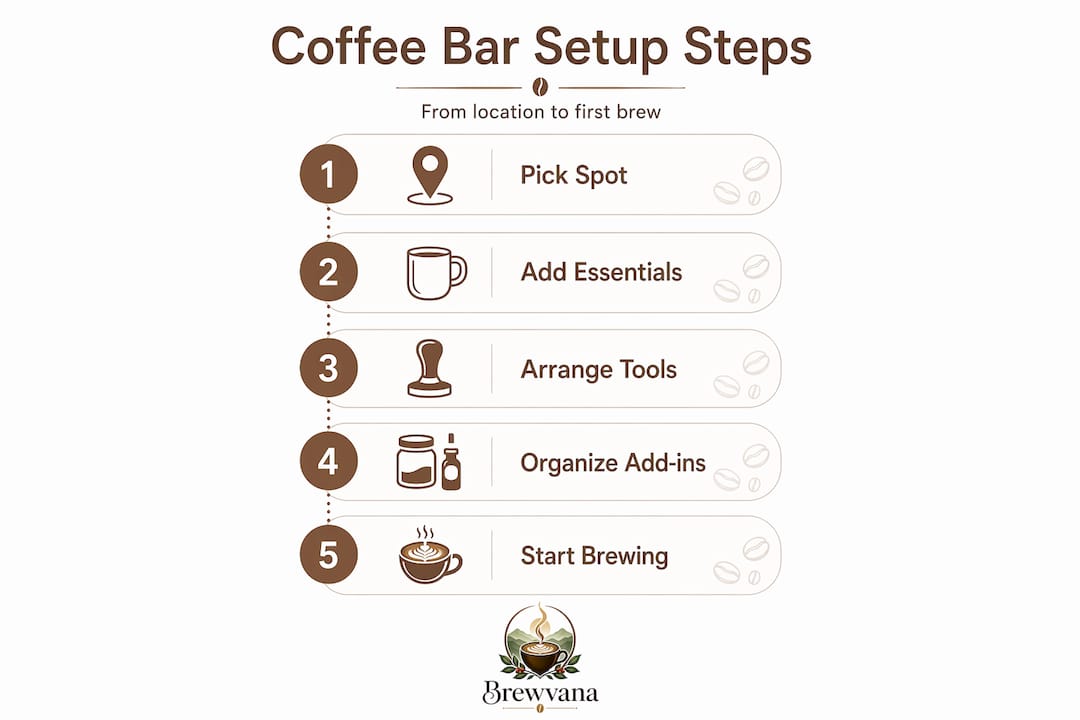
Setting up your coffee bar step by step
A well-organized DIY coffee corner is not just about where things sit. It is about how your hands move through the process. The best setups are designed around workflow, not aesthetics, and the good news is that when workflow is right, aesthetics tend to follow.
-
Map your brewing sequence first. Stand at your chosen spot and trace the path: you pick up beans, grind them, transfer grounds to your brewer, add water, brew into a cup, then clean up. Your station layout should match this exact left-to-right or right-to-left flow. Zone your equipment by task so each step leads naturally to the next.
-
Place the grinder at the start of the line. Your grinder is used first every morning, so it goes at one end. Bean storage belongs directly beside or above it so you are not reaching across your setup to grab beans.
-
Position your brewer in the center zone. This is your main workspace. Keep your scale here, along with your kettle if you use a pour-over method. If you have an espresso machine, allow room for tamping and portafilter prep immediately in front of the machine.
-
Create a dedicated cup zone. A small shelf above or a simple mug tree beside your brewer keeps cups accessible and shows off pieces you actually love. This is where personality enters the setup without compromising function.
-
Build in a cleanup zone. A small dish for grounds, a knock box for espresso, and a damp cloth caddy near the edge of your station closest to the sink. Keeping cleanup tools at hand means you use them, which means your station stays clean.
-
Route your power carefully. Run cords along the back of the station and use a short power strip mounted against the wall or inside a cabinet. Visible cords kill the look of even a beautiful setup.
Pro Tip: Use small labeled containers for common add-ins like sugar, cinnamon, or cocoa powder and tuck them into a shallow tray near the cup zone. It looks intentional and keeps daily use tidy.
Maintaining your coffee station over time
Setting up a coffee nook is a one-time project. Keeping it working well is an ongoing practice, and most people underestimate how much daily habits affect both equipment performance and cup quality.
The most common maintenance mistakes that experienced home baristas make:
- Skipping machine cleaning. Coffee oils build up inside your brewer and grinder, turning rancid over days. Rinse removable parts daily and run a full cleaning cycle on your machine weekly.
- Storing beans in the original bag after opening. Most coffee bags are not resealable well enough after the first day. Transfer beans to a proper airtight canister immediately.
- Ignoring grinder burr wear. Burrs dull over time, producing less consistent grounds. Most home burr grinders need burr replacement every 500 to 800 grams of coffee, depending on the model.
- Overcrowding the station. Every tool you add to the counter that you do not use daily makes the space harder to use. Store occasional accessories like Aeropress gear or cold brew equipment elsewhere and bring them out when needed. You can explore cold brew methods as your skills grow.
Pro Tip: Set a recurring calendar reminder once a month to descale your machine and wipe down the interior of your storage containers. Limescale buildup is the leading cause of home espresso machine failure, and it builds invisibly.
Signs your equipment is ready for an upgrade: your grinder sounds strained or inconsistent, your machine takes significantly longer to heat up than it used to, or your cups have developed a flat, lifeless quality despite fresh beans and correct ratios. Quality gear lasts years when maintained, but it does not last forever.
My honest take on home coffee setups
I have watched people spend $1,200 on an espresso machine and then wonder why their coffee tastes mediocre. And I have seen someone pull a genuinely exceptional cup from a $28 pour-over set. The gear matters less than people want to believe.
What actually transforms a coffee bar from a cluttered counter to something you love using every single day is the intention behind it. When you cupping coffee at home, you start to understand your palate. When you organize a space that makes sense for how you move in the morning, getting coffee becomes a moment you look forward to rather than a rushed transaction.
My advice to anyone building their first or fifth setup: start with less. Buy one great brewer, one good grinder, and exceptional beans. Get comfortable with that combination for a month before adding anything else. The upgrades that actually stick are the ones that solve a problem you have already run into, not the ones that sound impressive in a product description.
The home coffee enthusiasts I know who are most satisfied with their setups are not the ones with the most equipment. They are the ones who built their stations around how they actually make coffee, not around how they imagine they will.
— Kimberly
Stock your coffee bar with something worth brewing

Your station is only as good as what goes in it. Brewvana’s full coffee collection spans whole bean single-origins, artisan blends, and flavored roasts, all roasted to order so what arrives at your door is genuinely fresh. If you are not sure where to start, the flavored coffees sample pack lets you explore several profiles before committing to a full bag. For those who want to identify high-quality beans worth featuring in your setup, Brewvana’s site breaks down sourcing, roast level, and flavor notes for every product. Visit Brewvana to browse the full range and find something your coffee bar deserves.
FAQ
How much does it cost to set up a home coffee bar?
A functional setup starts under $100 using a pour-over brewer and a basic burr grinder. A full setup under $200 typically pays for itself within a month compared to daily cafe spending.
What is the most important piece of equipment for a home coffee station?
A burr grinder is the single most impactful tool you can own. Grind quality affects flavor more than the brewer you use, making it the best first investment for any home barista.
Where is the best place to put a home coffee bar?
Choose a low-traffic area near both a power outlet and a sink. Avoid placing your station near a stove or in a high-traffic zone to protect your workflow and your equipment.
How do I keep my coffee bar organized and clean?
Organize equipment by brewing sequence and store only daily-use tools on the counter. Distinct brewing and storage zones combined with a weekly cleaning routine keep the station functional and visually clean.
Can I set up a coffee bar without an espresso machine?
Absolutely. Manual methods like pour-over and French press produce cafe-quality coffee with minimal equipment when you use good beans and measure your ratios consistently.