

Cupping Coffee at Home Guide for Better Brewing
If you’ve ever wondered how professional tasters identify notes like “blackcurrant” or “cedar” in a cup of coffee, this cupping coffee at home guide has your answer. Cupping is the standardized method coffee professionals use to evaluate flavor, aroma, and quality. It’s not locked behind a barista certification or a fancy lab. With a few basic tools and the right process, you can run your own home coffee tasting session that genuinely sharpens your palate and transforms how you buy and brew coffee every single day.
Table of Contents
- Key takeaways
- Your cupping coffee at home guide starts with the right gear
- The step-by-step cupping process
- Common mistakes that quietly ruin your session
- Turning cupping results into better everyday brewing
- My honest take on home cupping
- Start cupping with Brewvana’s freshest beans
- FAQ
Key takeaways
| Point | Details |
|---|---|
| Freshness matters most | Use beans roasted within 7 to 14 days for the clearest, most expressive flavors during cupping. |
| Simple tools are enough | A burr grinder, a kitchen scale, and identical bowls are all you need to start cupping at home. |
| Follow the full process | Dry aroma, wet aroma, crust break, and slurping are each distinct steps that reveal different flavor layers. |
| Limit your samples | Start with 3 to 4 coffees per session to prevent palate fatigue and keep your evaluations accurate. |
| Cup consistently to improve | Regular practice builds sensory vocabulary and directly informs smarter brewing decisions over time. |
Your cupping coffee at home guide starts with the right gear
Getting your tools right before the first session saves you from guessing whether a flavor difference is real or just a result of inconsistent preparation. The good news is that you do not need professional cupping equipment to get meaningful results.
Here is what the core setup looks like:
| Tool | Role in cupping |
|---|---|
| Burr grinder | Produces a uniform medium-coarse grind for consistent extraction |
| Kitchen scale | Measures coffee and water precisely (standard ratio: 8.25g per 150ml) |
| Cupping bowls or ramekins | Hold individual samples; must be identical in size and material |
| Cupping spoon or deep tablespoon | Used to slurp coffee for even palate coverage |
| Gooseneck kettle | Controls pour direction and water temperature accurately |
| Cupping forms or notebook | Records aroma, flavor, acidity, body, and finish notes |
| Timer | Tracks steep time precisely |
Pro Tip: If you don’t have official cupping bowls, use identical ceramic ramekins or mugs. What matters is that every vessel holds the same volume and is made of the same material.
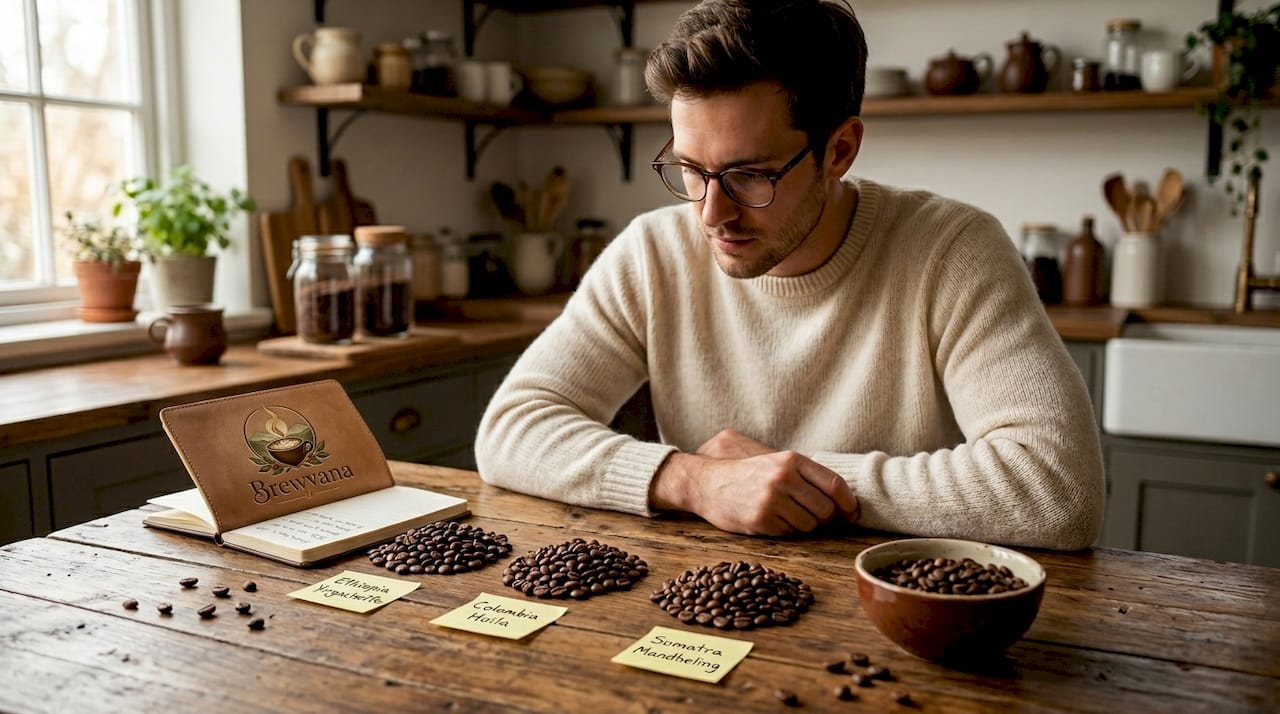
Choosing the right beans
Bean selection is where home coffee tasting gets genuinely exciting. Cupping is most revealing when you compare coffees from different origins, roast levels, or processing methods. A washed Ethiopian alongside a natural Brazilian tells you more about your own palate in one session than months of drinking a single blend ever could.
The single biggest variable most home brewers overlook is roast freshness. Flavor compounds degrade rapidly after roasting, and optimal cupping freshness falls in the 7 to 14 day window post-roast. Beans roasted more than three weeks ago will give you a flat, muted session that makes it genuinely hard to distinguish one coffee from another.
Grind size also matters more than most people think. A medium-coarse grind resembling coarse sand or sea salt gives hot water consistent access to the grounds without over-extracting. Grinding too fine turns your cupping into a muddy, bitter mess that masks the very flavors you’re trying to identify.
To broaden your flavor discovery, try sourcing coffees with different processing methods. Understanding how processing affects taste, whether washed, natural, or honey, gives you a much richer framework for evaluating what you detect in the cup. You can read more about processing method differences to build that context before your first session.
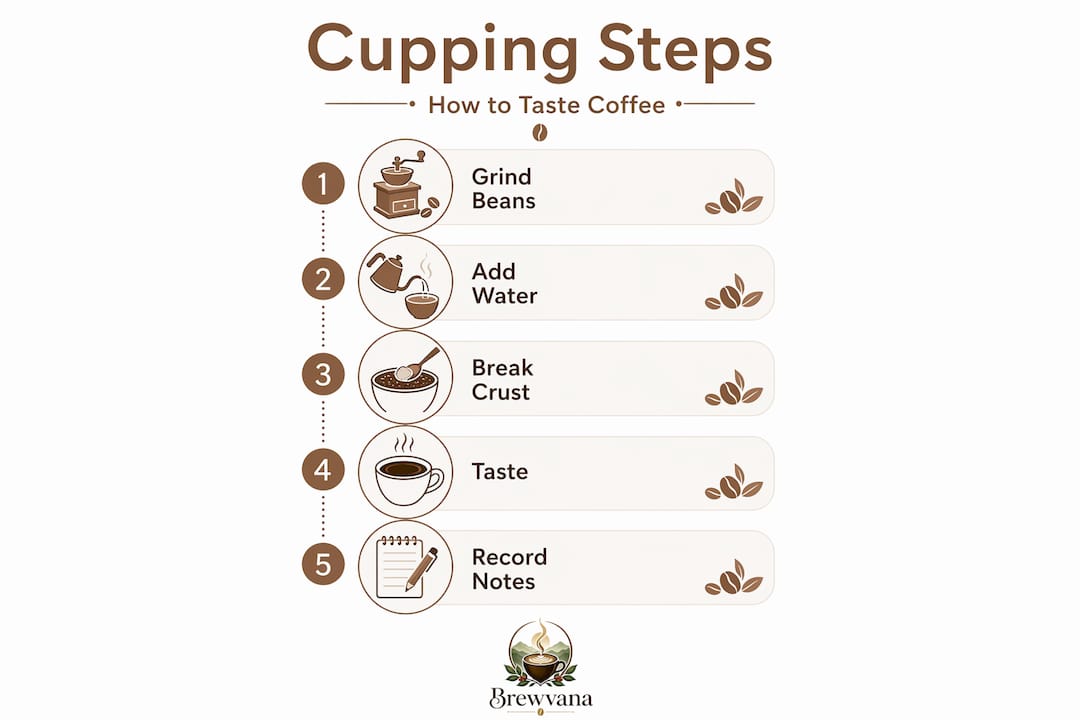
The step-by-step cupping process
This is where the actual coffee cupping technique comes to life. Each step builds on the last, and skipping any one of them means missing an entire dimension of flavor data.
-
Set up your station (5 minutes before): Place your identical bowls on a flat surface. Label each one with the coffee name or number. Pre-weigh 8 to 9 grams of whole bean coffee per 150ml of water for each sample. Keep samples separate and covered until grinding.
-
Grind each coffee (2 minutes before): Grind one sample at a time to a medium-coarse consistency. Wipe your grinder between samples with a dry brush or run a small amount of the next coffee through first to purge residue.
-
Smell the dry grounds: Before adding water, lean over each bowl and inhale slowly. This dry fragrance step often reveals floral, fruity, or nutty top notes that disappear once water is added. Write down what you notice immediately.
-
Add hot water: Heat water to between 195 and 205 degrees Fahrenheit and pour it directly over the grounds, saturating every particle. Fill each bowl to the same level. Start your timer.
-
Let it steep for 4 minutes: Do not stir, tap, or disturb the bowls. A crust of grounds will form on the surface. Use this time to revisit your dry fragrance notes.
-
Break the crust: At exactly 4 minutes, use your spoon to gently push through the crust on each bowl, one at a time. Dry and wet grounds release distinctly different aromatic notes, and the crust break moment is one of the most revealing in the entire process. Lean in and inhale immediately as you break each one.
-
Remove the grounds: Use two spoons to skim the remaining foam and floating grounds off the surface of each bowl. Rinse your spoons between bowls.
-
Let the coffee cool (8 to 10 minutes): Flavors shift dramatically as coffee cools. Rushing to taste while the coffee is scalding hot masks acidity, sweetness, and body. Wait until it reaches roughly 140 degrees Fahrenheit to begin tasting.
-
Slurp to taste: Load your cupping spoon and slurp forcefully. The goal is to spray the coffee across your entire palate simultaneously, covering your tongue, cheeks, and the back of your throat. This is what separates cupping from drinking. Evaluate flavor, acidity, body, and aftertaste.
-
Continue tasting as it cools: Timing and protocol are critical at the competitive level, but at home the most important rule is to taste each sample at the same temperature. Going back repeatedly as the coffee cools reveals sweetness and subtle fruit notes that heat was hiding.
Pro Tip: Rinse your spoon in a separate water glass between every sample, not just between rounds. Cross-contamination from even a drop of one coffee can influence your read on the next.
Common mistakes that quietly ruin your session
Even experienced home cuppers fall into habits that undermine their results. Knowing what to watch for protects the accuracy of your evaluations.
- Inconsistent grind size: Different grind sizes mean different extraction rates, which means you’re not comparing the coffees fairly. You’re comparing your grinder technique.
- Wrong water temperature: Water below 195°F under-extracts and produces flat, sour notes. Water above 205°F scorches delicate aromatics. A thermometer is not optional if you want repeatable results.
- Too many samples at once: Beginners should cup 3 to 4 samples per session. More than that and your palate loses its ability to distinguish one coffee from another, no matter how focused you feel.
- Skipping the notes: Memory is not reliable enough for sensory evaluation. Writing down impressions immediately, even just single words, creates a record you can actually learn from over time.
- Tasting on an empty or overly full stomach: Your palate is sharpest when you’re mildly hungry but not starving. Eat a light, neutral meal at least an hour before a session.
“The professionals who develop the sharpest palates aren’t the ones with the best natural taste. They’re the ones who practice with discipline and log everything.”
Controlling variables is the fastest way to accelerate your learning. Use the same water source, the same scale, and the same bowls every session. When one variable changes between sessions, you won’t know if the flavor difference comes from the coffee or your setup.
Pro Tip: Use fragrance-free soap to wash your cupping equipment and rinse it thoroughly. Residual dish soap aromas are potent enough to skew your evaluation of delicate floral or fruity coffees.
Turning cupping results into better everyday brewing
A cupping session is only valuable if you use what you learn. Here is how to connect your notes to real decisions.
Coffee flavor profiling through cupping gives you a language for what you actually like. If you consistently rate high-acidity washed coffees lower than natural-processed ones, that tells you something concrete: your morning pour-over is probably better served with a low-acid, fruit-forward bean. If you loved the body and chocolate notes in a particular blend, look for beans from similar origins or roast profiles.
Cupping results can inform specific brewing adjustments. A coffee that tasted sharp and thin in the bowl often benefits from a slightly coarser grind and lower extraction in your brewer. A flat, heavy cup might need a finer grind or a brighter roast. The connection between cupping observations and daily brewing decisions becomes more intuitive the more sessions you run.
- Prefer fruit-forward flavors? Explore high-quality single origins from Ethiopia, Kenya, or Colombia.
- Find certain coffees taste harsh? Evaluate your water temperature first. It is the most overlooked variable in home brewing.
- Want more sweetness in your cup? Look for natural or honey-processed beans from Brazil or Guatemala.
- Hosting friends? Cupping 3 to 4 coffees together is one of the best ways to share your interest in specialty coffee without it feeling like a lecture.
Pro Tip: Make cupping a monthly ritual rather than a one-time experiment. Even a single session per month over six months produces a dramatic improvement in how precisely you can describe and seek out flavors you enjoy.
My honest take on home cupping
I’ve had home cuppers tell me they spent weeks waiting to start because they thought they needed official cupping bowls, a calibrated scale, or beans from a specialty roaster to “do it right.” That’s the myth I most want to put to rest.
My first home cupping session used coffee mugs, a bathroom scale, and beans I’d had for three weeks. The results were barely useful. But the session itself taught me more about how coffee actually works than a year of just drinking it. The learning doesn’t require perfect conditions. It requires showing up with curiosity and writing things down.
What I’ve found, after dozens of sessions, is that the people who improve fastest are the ones who are honest about what they taste rather than what they think they should taste. If a highly rated Ethiopian natural tastes sour to you, write “sour.” Don’t write “bright citrus acidity” because that’s the expected note. Your palate is the instrument. Calibrate it honestly.
The other thing most guides don’t tell you is that disciplined, long-term practice separates average from excellent sensory evaluation. You will not develop a refined palate after two sessions. Give it three to six months of regular cupping and the shift becomes undeniable.
— Kimberly
Start cupping with Brewvana’s freshest beans
The fastest way to get more out of your cupping sessions is starting with genuinely fresh, diverse beans. Brewvana roasts to order, which means you receive beans at peak freshness, right inside that critical 7 to 14 day window. For home cuppers, the sample packs are a natural starting point. Each pack gives you multiple distinct coffees to compare side by side, which is exactly what a good cupping session needs.
If you want to go deeper into single-origin exploration, Brewvana’s single origin collection covers a range of regions, roast profiles, and processing methods. You can cup a washed Ethiopian against a natural Brazilian in the same session and immediately start building your flavor vocabulary. Every bag ships roasted to order so the freshness that makes cupping meaningful is never in question.
FAQ
What is coffee cupping and why should I try it at home?
Coffee cupping is a standardized tasting method used by professionals to evaluate flavor, aroma, body, and acidity. Doing it at home builds sensory vocabulary, improves your brewing decisions, and makes buying better coffee much easier.
What equipment do I need to cup coffee at home?
You need a burr grinder, a kitchen scale, identical bowls or mugs, a deep spoon, a kettle, and a timer. Professional cupping gear helps, but it is not required to get meaningful results.
How fresh do beans need to be for cupping?
Beans should be used within 7 to 14 days of the roast date for the most expressive flavors. Older beans produce flat, muted results that make it hard to distinguish one coffee from another during a session.
How many coffees should I cup in one session?
Beginners should start with 3 to 4 samples per session. More than that causes palate fatigue and makes accurate comparison unreliable.
How do I use cupping results to brew better coffee?
Map what you observed in the cup to your brew variables. A sharp, thin cup suggests lower extraction. A flat, heavy cup often benefits from a finer grind or fresher beans. Consistent note-taking across sessions shows patterns that guide smarter adjustments.