

Experimenting with coffee brewing methods is the practice of changing one brewing variable at a time to discover how each factor shapes flavor, body, and aroma in your cup. The two fundamental extraction categories are immersion and percolation. Immersion methods like French press and cold brew soak grounds for 4–24 hours, producing fuller-bodied coffee. Percolation methods like pour-over and drip pass water through grounds in 3–4 minutes for a cleaner, brighter result. Understanding this split is the starting point for any home brewer who wants to move from guessing to knowing. Brewvana’s approach to coffee experimentation puts that knowledge in your hands.
What do you need to experiment with coffee brewing methods?
Effective coffee brewing experimentation starts with the right tools and a clear understanding of which variables to control. Without both, your results will be inconsistent and hard to repeat.
Core equipment for home experiments
The five tools that matter most are a burr grinder, a gooseneck kettle, a digital scale, a French press or pour-over dripper, and an AeroPress. Each serves a specific function. The burr grinder gives you consistent, adjustable grind size. The gooseneck kettle lets you control pour speed and water temperature. The digital scale removes guesswork from your coffee-to-water ratio. An AeroPress is especially useful for beginners because it tolerates a wide range of variables and still produces good coffee.
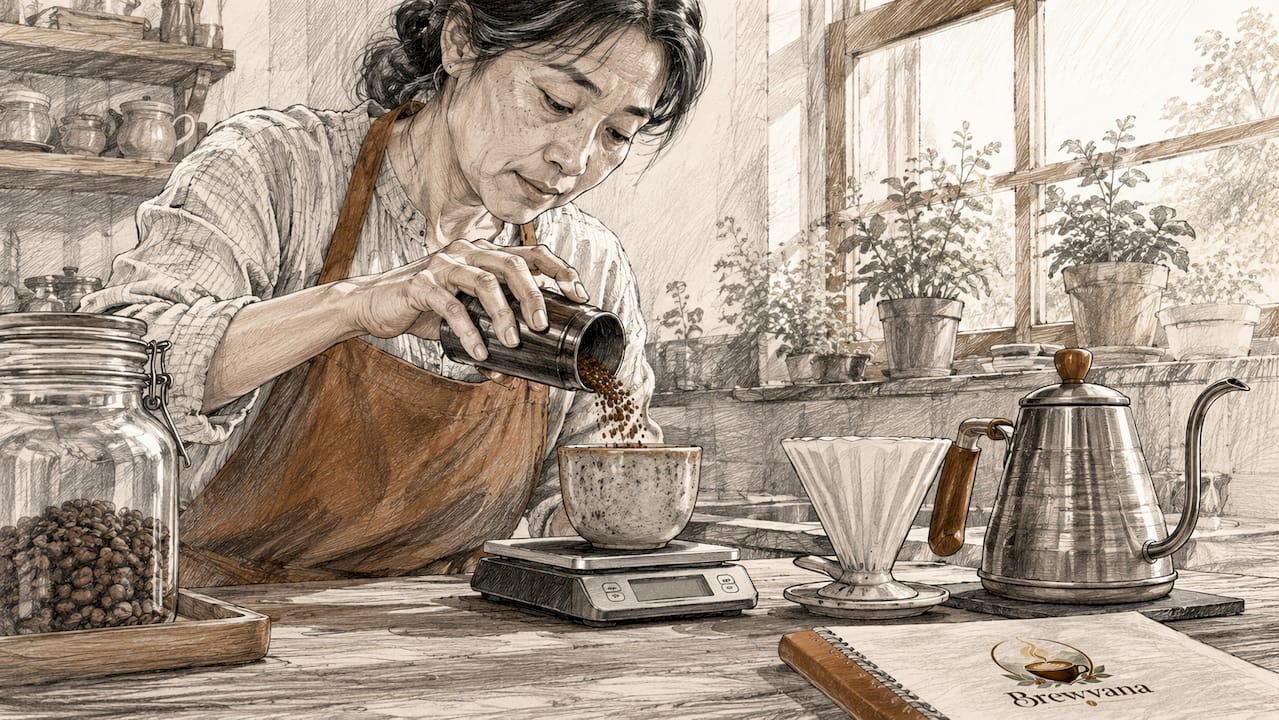
For more precise tracking, TDS meters and pH meters give you objective data on extraction strength and acidity. A TDS reading tells you how much dissolved material is in your cup. That number correlates directly with whether your coffee tastes weak, balanced, or over-extracted. A thermometer rounds out the kit by keeping water temperature consistent between brews.
The key variables to test
The six variables that most affect flavor are grind size, water temperature, brew time, water chemistry, coffee-to-water ratio, and agitation. Grind size controls how fast water extracts flavor compounds. Water temperature determines which compounds dissolve first. Brew time sets how long extraction continues. Water chemistry affects how minerals interact with coffee oils. The coffee-to-water ratio sets overall strength. Agitation, such as stirring or swirling, influences how evenly grounds saturate.
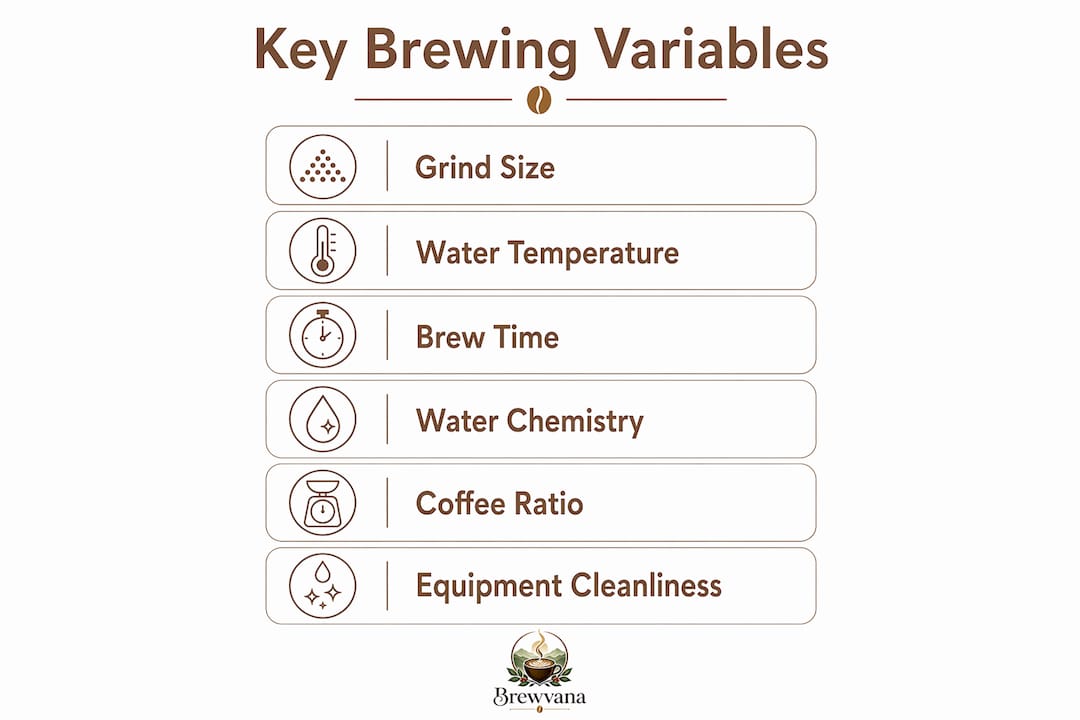
Clean equipment and fresh beans are non-negotiable for reliable results. Dirty filters introduce off-flavors that mask subtle experiment outcomes. Stale beans produce flat, inconsistent results regardless of technique. Proper bean storage practices extend freshness and protect the integrity of your experiments.
Pro Tip: Change only one variable per brewing session. This single-variable approach, known as OVAT (one variable at a time), is the fastest way to understand what each adjustment actually does to your cup.
How do you run a step-by-step coffee brewing experiment?
A structured experiment produces results you can learn from. A random one produces a cup you cannot explain. The sequence below gives you a repeatable framework for experimenting with coffee flavors from the ground up.
-
Start with water quality. Water composes 98.5% of brewed coffee, making it the most influential variable in the cup. Use filtered water with low mineral content as your baseline. Tap water with high chlorine or mineral levels will distort every other variable you test.
-
Lock in your grind size. Once water is consistent, choose a grind setting and hold it fixed for several brews. Medium grind works as a neutral starting point for most methods.
-
Test water temperature. Brew the same coffee at 195°F and 205°F using identical parameters. The flavor difference will be clear. Lower temperatures extract less bitterness. Higher temperatures pull more complexity but can tip into harshness.
-
Introduce the bloom. For pour-over and AeroPress, add twice the weight of water to coffee and wait 30 seconds before the full pour. This releases trapped CO2 and improves even extraction.
-
Vary the brew method. Once water, grind, and temperature are dialed in, switch the brewing method entirely. Brew the same beans in a French press and a pour-over on the same day. The contrast will teach you more about extraction than any single variable test.
Pro Tip: Run blind tastings when testing grind size. Pour two cups without labeling which is which, then taste both before checking your notes. Blind grind-size sweeps remove cognitive bias and help you identify the exact setting where sweetness peaks and bitterness spikes.
The table below summarizes common experiment types and their expected flavor impact.
| Experiment type | Variable changed | Flavor impact |
|---|---|---|
| Water quality test | Filtered vs. tap water | Clarity, cleanliness, mineral aftertaste |
| Grind size sweep | Coarse to fine | Bitterness, sweetness, body |
| Temperature test | 195°F vs. 205°F | Acidity, complexity, harshness |
| Brew time test | Shorter vs. longer steep | Strength, extraction balance |
| Method comparison | French press vs. pour-over | Body, brightness, mouthfeel |
Avoid the most common mistake home brewers make: changing two variables in the same session. If you adjust both grind size and water temperature at once, you cannot know which change caused the flavor shift.
What happens when you experiment with each major brewing method?
Each brewing method responds differently to variable changes. Knowing what to expect from each one helps you choose the right starting point for your experiments.
Immersion methods: French press and cold brew
French press steeping produces a full-bodied, rich cup because grounds stay in contact with water for the entire brew time. Extending steep time beyond four minutes increases bitterness noticeably. Shortening it below three minutes leaves the cup thin and under-extracted. One technique most home brewers skip is swirling during the steep. Swirling saturates all grounds evenly without over-agitating them, which produces more consistent extraction than stirring alone.
Cold brew operates on the same immersion principle but at room temperature or in the refrigerator for 12–24 hours. The long, cold extraction produces low acidity and heavy body. Experimenting with steep time in cold brew is forgiving because changes happen slowly. Cutting steep time from 18 hours to 12 hours produces a noticeably lighter, less sweet result.
Percolation methods: pour-over and AeroPress
Pour-over brewing rewards precision. Small changes in pour speed, water temperature, or grind size produce clear, immediate flavor shifts. This makes it one of the best methods for isolating variables. The cleaner, brighter flavor of percolation comes from water passing through grounds only once, which limits how much body and oil reach the cup.
AeroPress is the most forgiving and flexible method for home experiments. You can brew it with a short 1-minute steep or a longer 3-minute steep. You can use fine or coarse grinds. You can brew it inverted or standard. This flexibility makes it ideal for beginners who want to explore different brewing styles without committing to one method.
Pro Tip: For your first method comparison experiment, use a single-origin Ethiopian or Costa Rican coffee. Their distinct fruit and floral notes respond visibly to method changes, making flavor differences easier to detect.
Pros and cons of each method for experimentation:
- French press: Easy to use, forgiving on grind size, but harder to isolate variables due to full-immersion contact
- Cold brew: Low acidity and great for long-variable tests, but slow feedback loop makes rapid iteration difficult
- Pour-over: Excellent variable isolation and clear flavor feedback, but requires consistent technique to get repeatable results
- AeroPress: Highly flexible and fast, ideal for beginners, but the wide tolerance range can make subtle differences harder to detect
How do you interpret your coffee experiment results?
Reading your results accurately is what separates a productive experiment from a confusing one. Three flavor signals tell you the most: bitterness, acidity, and sweetness.
Bitterness spikes when extraction goes too far. This happens with fine grinds, high water temperatures, or long brew times. Acidity increases with lighter roasts, higher temperatures, and faster percolation. Sweetness peaks in a narrow extraction window, typically when grind size and temperature are both dialed in correctly. If your cup tastes flat, extraction is too low. If it tastes harsh, extraction is too high.
Tracking TDS and pH alongside sensory notes gives you a complete picture. A TDS reading in the 1.2–1.5% range typically indicates a well-extracted cup. A pH below 5.0 signals high acidity. Pairing these numbers with written tasting notes builds a feedback loop that improves faster than memory alone.
Keep a simple brewing log for every session. Record these details:
- Date and bean used (origin, roast level, and days since roast)
- Grind setting (coarse, medium, fine, or a numbered burr setting)
- Water temperature (in degrees Fahrenheit)
- Brew time (in minutes and seconds)
- TDS reading (if available)
- Sensory notes (bitterness, acidity, sweetness, body, finish)
After five or six sessions, patterns emerge. You will see which variable changes produced the biggest flavor shifts and which had little effect. Comparing the same coffee brewed two different ways is one of the fastest ways to sharpen your palate and understand what extraction actually does to flavor. Experiments that reveal improvement are worth repeating with a slight adjustment. Experiments that produce a worse result are equally valuable because they tell you exactly what to avoid.
Key takeaways
Systematic coffee experimentation produces better results than random trial and error because it isolates cause and effect in every cup you brew.
| Point | Details |
|---|---|
| Start with water quality | Water makes up 98.5% of brewed coffee, so fix this variable before testing anything else. |
| Change one variable at a time | The OVAT method prevents ambiguous results and speeds up learning. |
| Match method to experiment goal | Use pour-over for precise variable isolation and AeroPress for flexible, fast iteration. |
| Use blind tastings | Removing labels during grind-size tests eliminates bias and reveals true flavor preferences. |
| Keep a brewing log | Written notes and TDS readings build a feedback loop that improves your coffee faster than memory. |
What I have learned from years of brewing experiments
The single most useful experiment any home brewer can run is brewing the same coffee twice in the same morning using two different methods. It sounds simple, but it teaches you more about extraction than weeks of reading. When you taste a French press and a pour-over side by side from the same beans, the body and clarity contrast becomes impossible to ignore. Your palate calibrates fast when the reference point is right in front of you.
Water quality is where most home brewers underinvest. They spend money on grinders and kettles, then brew with unfiltered tap water. The mineral content in tap water varies dramatically by city and season. That variation alone can make a great bean taste mediocre. Fixing your water first is not a luxury. It is the foundation every other experiment depends on.
The most common mistake I see is impatience. Home brewers change two or three variables at once because they want faster results. The opposite happens. Results become unreadable, and frustration replaces curiosity. Slow, methodical experimentation feels slower but produces usable knowledge in half the time.
The goal is not a perfect cup on the first try. The goal is a system that gets you closer to your ideal cup with every session. Coffee experimentation is a practice, not a project. Build it into your morning routine, keep your notes consistent, and the improvements compound over time. A home coffee tasting ritual makes that practice sustainable and genuinely enjoyable.
— Brewvana
Fresh beans worth experimenting with from Brewvana
The quality of your beans determines the ceiling of every experiment you run. Brewvana sources and roasts to order, so the coffee you receive is fresh enough to reveal the subtle flavor shifts that experiments depend on.
Single-origin coffees from Costa Rica, Ethiopia, and Peru each bring distinct flavor profiles that respond visibly to method changes. Ethiopian naturals show fruit and floral notes that shift dramatically between immersion and percolation. Costa Rican beans highlight brightness and clean sweetness in pour-over. Peruvian coffees show chocolate and nut notes that deepen with longer immersion times. Brewvana’s single-origin collection gives you the raw material to run meaningful experiments from your first brew to your fiftieth.
FAQ
What is the best brewing method for beginners to experiment with?
AeroPress is the best starting method for beginners because it tolerates a wide range of grind sizes and brew times while still producing good coffee. Its short brew cycle also gives you fast feedback between experiments.
How do I know if my coffee is over-extracted or under-extracted?
Over-extracted coffee tastes bitter and harsh. Under-extracted coffee tastes sour, weak, or flat. Adjusting grind size coarser reduces extraction; adjusting finer increases it.
Why does water quality matter so much in coffee experiments?
Water makes up 98.5% of brewed coffee, so its mineral content and chlorine levels directly affect flavor. Starting with filtered water gives you a neutral baseline that makes every other variable easier to read.
How many experiments do I need to run before I see improvement?
Most home brewers notice clear improvement after five to six focused sessions. Keeping a brewing log accelerates this because written notes reveal patterns that memory misses.
What does a TDS meter tell me about my coffee?
A TDS meter measures the concentration of dissolved solids in your cup. A reading in the 1.2–1.5% range typically indicates a well-extracted, balanced brew. Readings outside that range point to under or over-extraction.