

Building a Home Coffee Tasting Ritual That Works
Building a home coffee tasting ritual is the process of establishing a repeatable, sensory-focused routine that helps you evaluate and enjoy coffee with greater awareness and control. Professionals call this practice “cupping,” and the same structured approach used by Specialty Coffee Association (SCA) judges translates directly to your kitchen counter. You don’t need a commercial lab or expensive gear. You need the right sequence, a few reliable tools, and the willingness to pay attention. This guide walks you through every step, from setting up your space to designing tasting flights that sharpen your palate over time.
What tools and environment do you need for a home coffee tasting ritual?
The right setup removes variables that distort your perception. When your cups are cold, your water is inconsistent, or your space is noisy, you lose the ability to compare coffees fairly. Standardization is the foundation.
The essential gear list
You don’t need to spend hundreds of dollars. The core items are:
- Kitchen scale (accurate to 0.1g) for consistent coffee-to-water ratios
- Burr grinder for uniform particle size (blade grinders produce uneven extraction)
- Gooseneck kettle with temperature control, targeting 200°F for most filter coffees
- Two or more identical ceramic cups (6–8 oz works well for side-by-side comparison)
- Cupping spoons or standard soup spoons for slurping samples
- Filtered water to eliminate chlorine and mineral interference
- The SCA Coffee Taster’s Flavor Wheel printed or on your phone for reference
Setting up your tasting space
Your environment shapes what you taste. Set up near natural light so you can observe color and clarity in the cup. Remove strong food smells from the room before you start. A clean, quiet counter with your cups arranged in a row creates the mental focus that tasting requires.
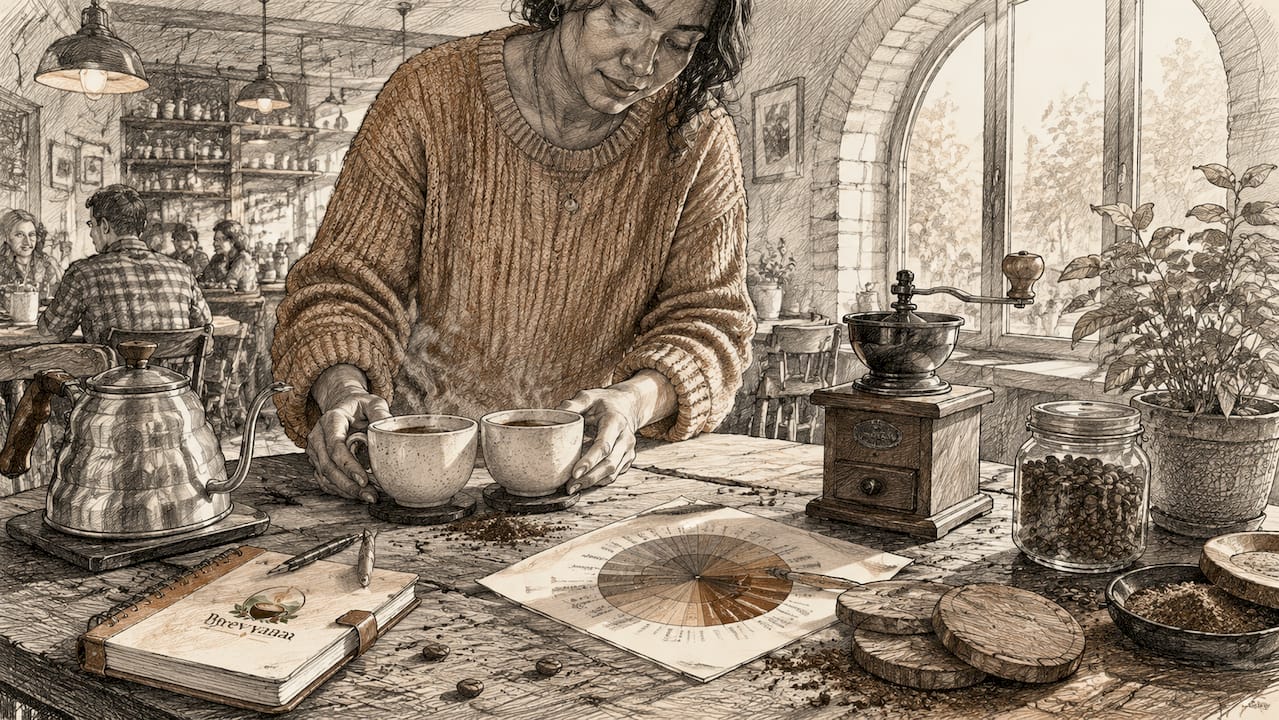
Preheating your cups for at least 30 seconds with hot water prevents thermal shock and preserves delicate flavors. Discard that water before brewing. This single step improves flavor clarity more than most people expect.
| Item | Why It Matters |
|---|---|
| Burr grinder | Produces even particle size for consistent extraction |
| Identical cups | Eliminates variables between samples during comparison |
| Filtered water | Removes off-flavors that mask coffee character |
| Temperature-controlled kettle | Prevents over-extraction from water that is too hot |
| SCA Flavor Wheel | Gives you structured vocabulary to name what you taste |
Pro Tip: Set up your tasting station the night before. Laying out cups, spoons, and your flavor wheel in advance means you start the session focused on tasting, not scrambling for equipment.
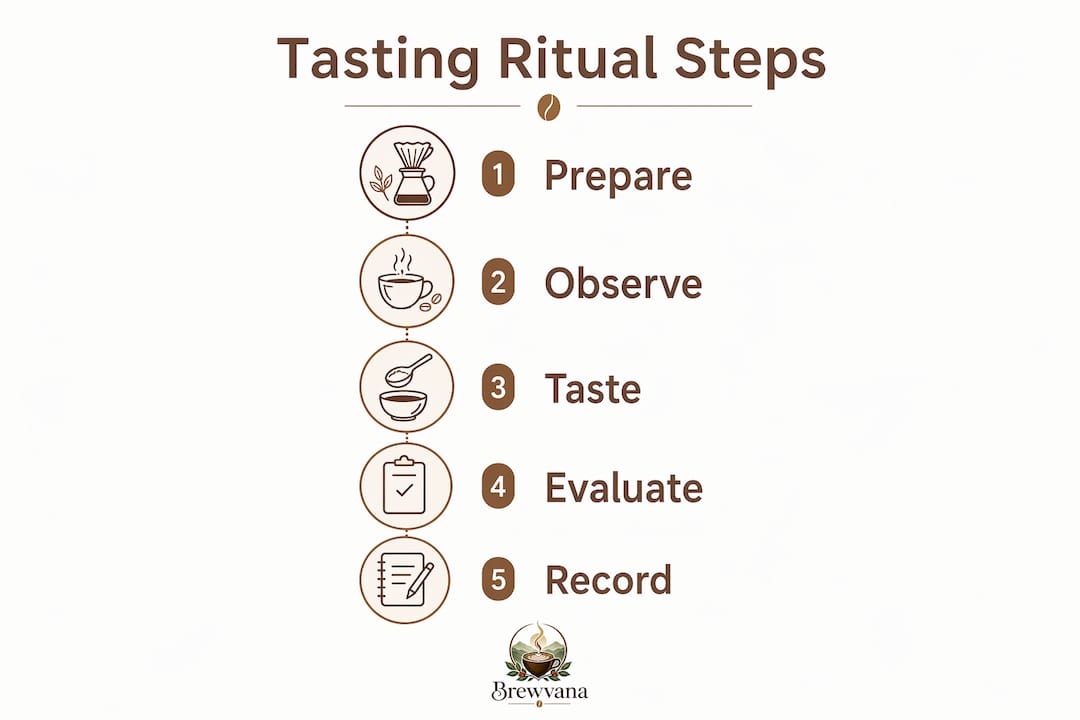
How to taste coffee at home: a step-by-step process
A standardized tasting sequence produces reliable, repeatable results. Follow the same order every session so your observations become comparable over time.
- Grind and dose. Use a ratio of roughly 1:15 coffee to water by weight. Grind fresh immediately before brewing to preserve aromatics.
- Preheat your cups. Fill each cup with hot water for 30 seconds, then discard. This stabilizes temperature across all samples.
- Add grounds and pour. Pour water at 200°F over the grounds simultaneously across all cups. Start your timer.
- Evaluate dry aroma. Before adding water, smell the dry grounds. This gives you a preview of the flavor profile.
- Break the crust. At the 4-minute mark, push the floating grounds aside with your spoon and inhale the released aroma. Do this at the same time across all cups.
- Skim the foam. Remove floating grounds and foam with two spoons so the liquid is clean for tasting.
- Slurp. Use a spoon to draw coffee across your entire palate with an audible slurp. Slurping sprays the liquid across your tongue and enhances flavor perception through retronasal olfaction. This is the same technique professional cuppers use worldwide.
- Assess and log. Note sweetness, acidity, body, and finish for each cup. Write it down immediately.
What to evaluate at each sip
Assess coffee across five dimensions in this order: aroma, acidity, sweetness, body, and finish. Acidity is the brightness or tartness you feel on the sides of your tongue. Body is the weight or texture of the liquid. Finish is what lingers after you swallow.
Tasting coffee at multiple temperature points reveals complexity that a single sip misses. Sweetness and aftertaste often emerge as the cup cools from around 160°F down to 120°F. Rushing your first sip at full heat risks missing those layers entirely.
Pro Tip: Keep a dedicated tasting notebook or use a free notes app. Log the coffee name, roast date, brew ratio, and your observations for each dimension. After six sessions, patterns emerge that tell you exactly what you prefer.
| Tasting Dimension | What to Notice |
|---|---|
| Aroma | Floral, fruity, roasted, or earthy notes before and after the crust break |
| Acidity | Brightness, tartness, or citrus-like quality on the sides of the tongue |
| Sweetness | Natural sugar-like quality, often more apparent as the cup cools |
| Body | Light and tea-like vs. heavy and syrupy mouthfeel |
| Finish | How long and pleasantly the flavor lingers after swallowing |
How to use comparative tasting to build your coffee palate
Tasting two or more coffees side-by-side is the fastest way to train your palate. Differences that are invisible when tasting alone become obvious when you move directly between cups. This is the core insight behind professional cupping, and it works just as well at home.
The SCA Coffee Taster’s Flavor Wheel organizes coffee flavor descriptors into nine primary categories: Fruity, Floral, Sweet, Nutty/Cocoa, Spices, Roasted, Green/Vegetative, Other, and Fermented. Start with the broad outer ring and work inward to specific notes. Saying “this tastes fruity” is a valid starting point. Over time, you narrow it to “dried cherry” or “fresh blueberry.”
Structured exercises that accelerate learning
Three exercises produce the fastest palate development:
- Triangle testing: Brew three cups where two are the same coffee and one is different. Try to identify the odd one out. This sharpens pattern recognition faster than open-ended tasting.
- Roast-level flights: Taste the same origin at light, medium, and dark roast back to back. You’ll hear how roasting transforms the same bean’s acidity, sweetness, and body. Brewvana’s roast level flavor guide explains exactly what those transformations look like.
- Origin flights: Compare an Ethiopian natural process coffee against a Colombian washed coffee. The contrast in fruit-forward versus clean, balanced profiles is dramatic and educational.
A structured 8-week palate development approach recommends tasting 2–3 times per week for 15–30 minutes each session. Daily sessions accelerate early development even further. The key is consistency, not duration.
Pro Tip: When you find a flavor note you can’t name, smell something in your kitchen that matches it. Smelling a fresh lemon, a handful of walnuts, or a piece of dark chocolate right next to your coffee cup trains your brain to connect the aroma to the word.
| Tasting Method | Best For |
|---|---|
| Triangle test | Sharpening discrimination between similar coffees |
| Roast-level flight | Understanding how roasting transforms flavor |
| Origin comparison | Detecting terroir and processing differences |
| Single-coffee deep dive | Tracking flavor changes as the cup cools |
How to design tasting flights and pairings at home
A three-coffee flight by roast level is the simplest and most educational structure for home tasting. Light roast shows you the bean’s origin character. Medium roast balances origin and roast influence. Dark roast shifts focus to roast-driven flavors like chocolate, smoke, and caramel.
Structure your flight session like this:
- Start light. Taste your lightest roast first while your palate is fresh and most sensitive to delicate notes.
- Use a palate cleanser. A plain water cracker or a neutral biscuit between coffees resets your palate. Avoid flavored foods that leave residue.
- Move to medium, then dark. Heavier, bolder flavors should come last so they don’t overwhelm earlier impressions.
- Taste at two temperatures. Take a sip when the cup is hot, then return to it when it has cooled to around 120°F. Note what changed.
- Log your preferences. After the flight, write down which coffee you’d want to drink again and why. This builds a personal flavor profile over time.
Pairing coffee with food adds another dimension to home tasting. A bright Ethiopian natural process pairs well with fresh fruit or a light pastry. A dark roast from Colombia stands up to a square of 70% dark chocolate. These pairings aren’t rules. They’re experiments that teach you how flavors interact.
Pro Tip: Invite a friend to your next tasting session. Describing what you taste out loud to another person forces you to find the words, and that verbal practice builds your flavor vocabulary faster than silent tasting alone.
For a deeper look at how to run a full cupping session at home, Brewvana’s home cupping guide covers the complete process with brewing ratios and evaluation tips.
Key takeaways
A consistent, repeatable tasting process is the single most effective way to develop your coffee palate and gain real control over your brewing decisions.
| Point | Details |
|---|---|
| Standardize your setup | Use identical preheated cups, filtered water, and a scale every session for reliable comparisons. |
| Follow a fixed sequence | Assess aroma, acidity, sweetness, body, and finish in the same order every time. |
| Taste side-by-side | Comparing two or more coffees per session reveals differences invisible in solo tasting. |
| Use the SCA Flavor Wheel | Start with broad categories like Fruity or Roasted, then narrow to specific descriptors. |
| Log everything | Written tasting notes create a feedback loop that improves both your palate and your brewing. |
What consistent tasting has taught me about coffee
Most people assume a better palate requires years of formal training or access to specialty cafés. That assumption is wrong. The real barrier is the absence of a repeatable process, not a lack of natural ability.
At Brewvana, we’ve seen home brewers transform their understanding of coffee within a few weeks simply by tasting two coffees side-by-side instead of one at a time. The contrast does the teaching. You don’t need to know the vocabulary before you start. You build it through the act of searching for words to describe what you’re experiencing.
The hardest part of building this ritual isn’t the technique. It’s slowing down enough to actually pay attention. Most of us drink coffee on autopilot. The moment you sit down with two cups, a spoon, and a notebook, the experience becomes intentional. That shift in attention is where the learning happens.
One thing I’d push back on: don’t wait until you have the “perfect” setup to start. A kitchen scale, two mugs, and a bag of freshly roasted beans from a source you trust is enough. Complexity can come later. The ritual itself is what matters, and the sooner you start, the faster your palate develops. Personalize it. Taste what you enjoy. Skip the exercises that feel like homework. A ritual you actually repeat is worth more than a perfect protocol you abandon after two sessions.
— Brewvana
Explore brewvana’s coffees for your next tasting session
Building a tasting ritual is only as rewarding as the coffees you taste. Brewvana sources and roasts to order so every bag arrives at peak freshness, which matters more than most people realize when you’re trying to evaluate delicate flavor notes.
Start with a single origin favorites pack to get a range of origins in one order. Brewvana’s lineup includes Colombia single origin for balanced sweetness and caramel notes, Ethiopia Natural for bold fruit and floral complexity, Costa Rica for bright acidity and clean sweetness, and Peru for a smooth, mild body that works well as a baseline in any flight. Each of these origins tells a different story in the cup, and tasting them together is one of the most direct ways to understand how origin shapes flavor.
FAQ
What is a coffee tasting ritual at home?
A home coffee tasting ritual is a repeatable, structured routine for evaluating coffee flavor using consistent tools, techniques, and a fixed sequence of sensory assessments. It mirrors the professional practice of cupping, adapted for a home setting without commercial equipment.
How many coffees should i taste in one session?
Tasting 2–3 coffees per session is the most effective approach for palate development. Side-by-side comparison reveals differences that are undetectable when tasting a single coffee in isolation.
Do i need special equipment to start tasting coffee at home?
A kitchen scale, a burr grinder, a temperature-controlled kettle, and two identical cups are enough to run a reliable tasting session. The SCA Flavor Wheel, available free online, provides the vocabulary framework you need.
How often should i practice home coffee tasting?
Tasting 2–3 times per week for 15–30 minutes per session produces measurable palate improvement. Daily short sessions accelerate early development even faster, especially when you’re comparing new origins or roast levels.
Why does coffee taste different as it cools?
Sweetness and aftertaste become more apparent as coffee cools from around 160°F to 120°F. Tasting at multiple temperature points reveals flavor layers that a single hot sip cannot capture.