

A pour over coffee checklist is a step-by-step guide that covers every variable between you and a consistently great cup. The industry calls this method “manual drip brewing,” and it rewards precision more than any other home brewing technique. Get the 1:16 coffee-to-water ratio right, dial in your grind size, and control your pour, and the results are repeatable every single morning. Skip any one of those steps, and you are guessing. This guide gives you the complete pour over coffee checklist, from equipment priorities to troubleshooting bitter or sour cups.
1. What equipment belongs on every pour over coffee checklist?
The right gear does not guarantee a great cup, but the wrong gear guarantees a bad one. Every pour over brewing setup has five core pieces, and the order in which you buy them matters more than most brewers realize.
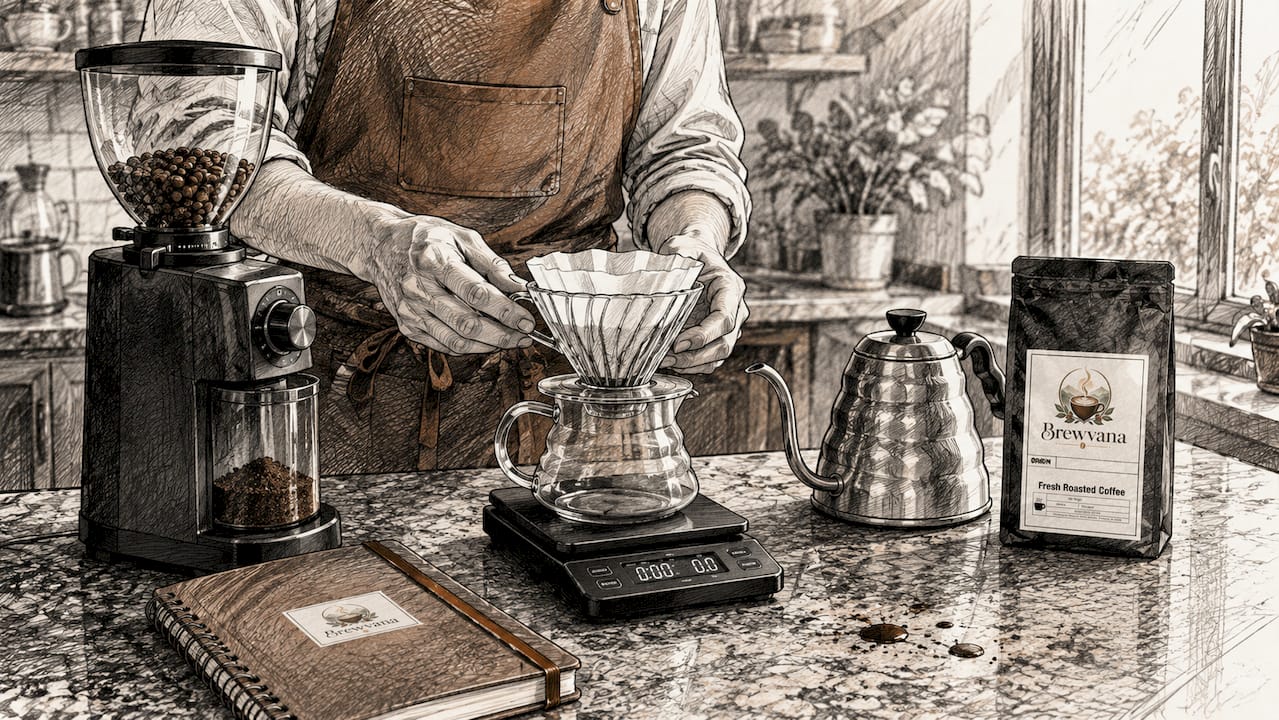
Burr grinder
A burr grinder is the top priority for any pour over setup. Blade grinders produce uneven particle sizes, which means some grounds over-extract while others under-extract in the same brew. A burr grinder produces uniform particles, which is the single biggest driver of flavor consistency.
Digital scale with timer
A digital scale removes the guesswork from dosing. Measuring by tablespoons introduces too much variation because coffee density changes with roast level and bean origin. A scale with a built-in timer also lets you track your pour rate and total brew time simultaneously.
Gooseneck kettle
A gooseneck kettle gives you direct control over where water lands on the coffee bed. Standard kettles pour too fast and too wide, which creates channeling. Channeling means water finds the path of least resistance through the grounds instead of saturating them evenly.
Dripper and filters
Cone drippers like the Hario V60 produce a faster drawdown and a brighter, more complex cup. Flat-bottom drippers like the Kalita Wave produce a slower, more forgiving drawdown and a fuller body. The filter type must match the dripper, and thicker filters slow extraction and mute some volatile aromatics.
Filtered water
Filtered water with 75–150 ppm TDS and a near-neutral pH is the baseline for clean flavor. Tap water with high chlorine content or off-flavors sets a ceiling on your cup quality that no technique can overcome.
Pro Tip: Buy your burr grinder before you buy a premium dripper. Upgrading your grinder delivers more flavor improvement per dollar than any other single purchase.
2. How do key brewing parameters fit into a pour over coffee guide?
Brewing parameters are the four dials you adjust to change what ends up in your cup. Each one affects extraction differently, and understanding the relationship between them is what separates repeatable results from lucky ones.
Coffee-to-water ratio
The standard starting ratio is 1:16, which means 20 grams of coffee to 320 grams of water. This produces a balanced, medium-strength brew that works well across most single-origin beans. Adjust toward 1:15 for a stronger cup or 1:17 for a lighter one, but always start at 1:16 to establish your baseline.
Grind size
Grind size controls how fast water moves through the coffee bed and how much surface area it contacts. A finer grind slows the flow and increases extraction. A coarser grind speeds the flow and decreases extraction. Grind size is the most powerful variable you have, and it should be your first adjustment when something tastes off.
Water temperature
Water temperature targets 195–205°F for most pour over brewing. Lighter roasts extract better at the higher end of that range because their cell structure is denser. Darker roasts extract well at the lower end, since the roasting process has already broken down much of the cellular structure.
Brew time
Total brew time serves as a diagnostic, not a rigid target. For a V60 or Kalita Wave, the target window is 2:30 to 3:30 minutes. A Chemex runs longer at 4:00 to 5:30 minutes because its thicker filters slow the drawdown. If your brew finishes outside those windows, adjust grind size before changing anything else.
| Parameter | Target Range | What to Adjust If Off |
|---|---|---|
| Coffee-to-water ratio | 1:16 (e.g., 20g to 320g) | Dose up or down by 1–2 grams |
| Water temperature | 195–205°F | Lower for dark roasts, raise for light |
| Brew time (V60/Kalita) | 2:30–3:30 minutes | Grind finer to slow, coarser to speed up |
| Brew time (Chemex) | 4:00–5:30 minutes | Grind finer to slow, coarser to speed up |
| Grind size | Medium to medium-fine | First variable to change when troubleshooting |
Pro Tip: Lock in your ratio and water temperature first. Once those are fixed, use brew time as your feedback signal for grind size adjustments.
3. Step-by-step technique: the core of your brewing checklist
Good technique turns good parameters into a great cup. Each phase of the brew has a specific purpose, and skipping or rushing any one of them shows up in the final flavor.
-
Preheat and rinse. Place your paper filter in the dripper and pour hot water through it. Rinsing removes papery taste and preheats both the dripper and the carafe below. Discard the rinse water before adding your coffee.
-
Dose and level. Add your ground coffee to the rinsed filter. Give the dripper a gentle shake to level the coffee bed. A flat bed creates even water contact during the bloom and main pours.
-
Bloom. Pour 40–60 grams of water over the grounds in a slow spiral, starting from the center and moving outward. Wait 30–45 seconds. This phase releases trapped CO2 from freshly roasted beans. CO2 repels water, so degassing first allows full, even extraction in the pours that follow.
-
Main pours. Pour in two to three stages, adding water in a slow spiral pattern each time. Each pour should saturate the entire coffee bed without flooding it. Aim to keep the water level consistent rather than letting it drop too low between pours.
-
Drawdown. Stop adding water once you reach your target weight. The remaining water filters through the grounds and drains into the carafe. Watch the coffee bed as it drains. A flat, even bed at the end signals even extraction. A bed with a crater or mound in the center signals uneven flow.
-
Taste and record. Taste the coffee before adding anything to it. Note the flavor, body, and finish. Write down your grind setting, dose, water temperature, and total brew time. That record becomes your reference point for the next brew.
“The bloom is not optional for fresh coffee. Skipping it means your main pours hit a CO2 barrier, and extraction becomes uneven from the first second of contact. Thirty seconds of patience here changes the entire cup.”
For a deeper look at how tasting connects to brewing decisions, the cupping coffee at home guide from Brewvana walks through how to evaluate what you are tasting and translate it into brew adjustments.
4. How to troubleshoot common issues using your pour over coffee checklist
Every off-tasting cup has a cause, and your checklist gives you the framework to find it. The key rule is to adjust only one variable at a time. Changing grind size and dose simultaneously makes it impossible to know which fix worked.
-
Sour or sharp taste (under-extraction). The water moved through the grounds too fast and did not pull enough soluble compounds. Grind finer by one to two increments. Check that your bloom was long enough and that your pour rate was slow enough to keep the bed saturated.
-
Bitter or harsh taste (over-extraction). The water spent too long in contact with the grounds and pulled bitter compounds. Grind coarser by one to two increments. Check your water temperature. Dropping it by 5°F can reduce bitterness in darker roasts without changing anything else.
-
Flat or hollow taste. This usually points to stale coffee rather than a technique error. Fresh beans, ideally used within two to four weeks of roast, produce noticeably more flavor and aroma. Brewvana’s flavored coffee sample pack ships roasted to order, which means you get beans at peak freshness rather than ones that have been sitting in a warehouse.
-
Uneven extraction or channeling. If the coffee bed shows a crater or the brew time is inconsistent between sessions, your pour pattern is the likely cause. Practice a slow, controlled spiral pour that starts at the center and covers the entire bed without hitting the filter walls.
-
Brew time too fast or too slow. Use brew time as a diagnostic. A brew that finishes in under two minutes is grinding too coarse. A brew that takes over four minutes on a V60 is grinding too fine. Adjust grind size first before touching any other variable.
Pro Tip: Keep a simple brew log in a notes app. After three or four sessions with the same bean, patterns become obvious. You will stop second-guessing and start dialing in with confidence.
For a full breakdown of the most common mistakes home brewers make with fresh beans, the Brewvana guide on freshly roasted bean mistakes covers the errors that show up most often in troubleshooting sessions.
Key Takeaways
A great pour over depends on getting equipment priorities right, locking in a 1:16 ratio, and using brew time as a diagnostic signal rather than a fixed target.
| Point | Details |
|---|---|
| Equipment order matters | Buy a burr grinder first, then a scale, then a gooseneck kettle, then a dripper. |
| Start with 1:16 ratio | Use 20g of coffee to 320g of water as your baseline before making adjustments. |
| Bloom every time | Pour 40–60g of water over fresh grounds and wait 30–45 seconds to release CO2. |
| Adjust one variable at a time | Change grind size first when troubleshooting; never adjust two variables simultaneously. |
| Use brew time as feedback | If drawdown is too fast or slow, fix grind size before changing pour technique or dose. |
What I have learned from building my own pour over checklist
The single best thing I did early on was commit to one dripper, one bean, and one recipe for a full month. It felt limiting at first. But within two weeks, I could taste the difference between a 30-second bloom and a 45-second bloom on the same bean. That kind of sensitivity only develops when you hold everything else constant.
The second lesson was about equipment sequence. I bought a beautiful ceramic dripper before I owned a burr grinder. The dripper looked great on the counter and did nothing for my cup. The day I switched from a blade grinder to a burr grinder, the improvement was immediate and obvious. No technique change, no new recipe. Just uniform particle size.
The third thing I got wrong was treating brew time as a target rather than a signal. I would hit 3:00 minutes and feel satisfied, even when the cup tasted sour. Once I understood that brew time tells you whether your grind size is right, not whether your brew is good, troubleshooting became much faster.
My honest advice: build your checklist around the grinder and the scale first. Everything else is refinement. And if you want to train your palate faster, start tasting your coffee black before you add anything to it. The feedback is immediate and unfiltered.
— Brewvana
Brewvana’s coffee picks for your pour over setup
Building a great pour over routine takes time, but the beans you use should not slow you down.
Brewvana sources and ships coffee roasted to order, so every bag arrives at peak freshness. For days when you want a quality cup without the full manual process, Brewvana’s instant coffee delivers a clean, flavorful result in under a minute. The single serve capsules work well for quick weekday mornings when the full pour over setup is not practical. And if you are still exploring which flavor profiles you enjoy most, the flavored coffee sample pack lets you taste across multiple roasts and origins before committing to a full bag. Every purchase also supports local schools through Brewvana’s community giving program.
FAQ
What is the best coffee-to-water ratio for pour over?
The standard starting ratio is 1:16, which means 20 grams of coffee to 320 grams of water. Adjust slightly up or down based on your strength preference.
How long should a pour over take to brew?
A V60 or Kalita Wave should finish in 2:30 to 3:30 minutes. A Chemex takes longer at 4:00 to 5:30 minutes due to its thicker filters.
Why does my pour over taste sour?
Sour flavor signals under-extraction. Grind finer by one to two increments and make sure your bloom lasts at least 30 seconds before starting your main pours.
Do I need to rinse the paper filter?
Rinsing removes the papery taste from the filter and preheats your dripper and carafe. It takes 10 seconds and noticeably improves flavor clarity.
What grind size works best for pour over coffee?
Medium to medium-fine is the standard starting point. Use your total brew time as the signal: grind finer if the brew finishes too fast, coarser if it runs too slow.